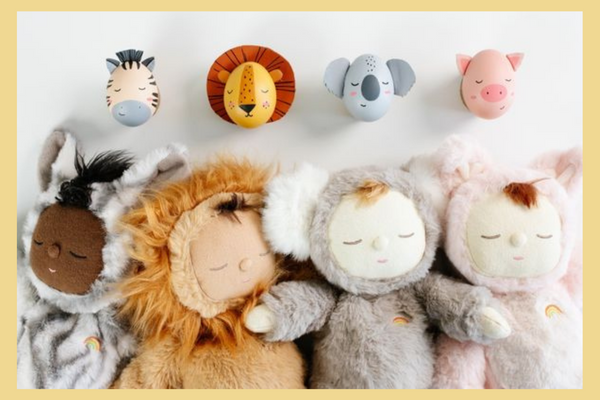
You’ve heard of hand-painted Easter eggs, but have you ever seen an egg as delightful as our Cozy Dinkum-themed hatchlings? Our friend @cardboardfolk dreamed up an egg-cellent DIY craft for your kiddos and their Cozy Dinkums. Roll up your sleeves mum, dad, grandma, and Funcle Tom, let's get crafty.
~
You will need:
Eggs
Paint & paintbrushes
A pencil
Thin cardboard (like a cereal box)
Scissors
Paint pens or markers
Glue (PVA or a glue gun - with help from a grown up)
Cozy Dinkum friends
-
 01Gather Your Googies
Ever tried to paint a raw egg? We don’t recommend it. Avoid messes by hard-boiling them first. Place room temperature eggs in a saucepan and cover with cold water, bring to the boil, and cook for 10 minutes, then allow the eggs to cool. -
 02Get Your Mini Picasso On
Mix paint colours to match your Cozy Dinkum and cover the entire egg with two coats. TIP: slice a TP roll to create a base for the egg, like an egg cup. Consider using a hair dryer to dry wet paint between coats. -
 03Add A Cute Little Face
Use paint and markers to create Cozy Dinkum faces for the eggs. We used a pencil to lightly draw the outline before adding facial features with a black paint pen. -
 04Add Eggs-tra Personality
We created ears, hair, and manes from scrap cardboard. Be sure to leave a little extra cardboard attached to the base of the ears to make them easier to glue on, just fold the extra cardboard over to create a tab. -
 05Add Finishing Touches
Use paint pens and markers to add detailing to your egg accessories. When decorating the cardboard, remember to paint the back too. -
 06Assemble Your Cozy Dinkum Egg
Glue the ears, hair, and manes to the eggs. If using PVA glue, hold the ears in place until the glue is tacky, then use masking tape to keep them in place until the glue sets. Alternatively, always ask a grown up for help when using a hot glue gun.

 Welcome to Olli Ella!


