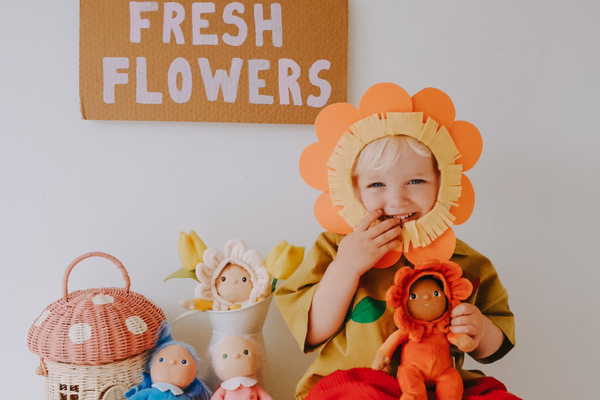
Blooming Fun: Craft A Dinky Dinkum Flower Hat
We teamed up with @liddierowl on our latest DIY adventure to combine the charm of Dinky Dinkum Blossom Buds with the magic of handmade flower hats! Dive into a delightful crafter-noon and make floral crowns for your kiddos to match their Blossom Buds. Let your imagination bloom alongside your Dinky Dinkum friends!
-

Step 01
Start by cutting a circle out of cardboard (a little larger than the size of your child’s face). Cut a smaller circle within your original circle to create a cardboard ring approximately 4cm in width.
-

Step 02
Cut petals out of coloured foam. You can use whatever shape and colour you like. We used around 9-12 petals, but it will all depend on the petal shape chosen and width of your child's face.
-

Step 03
With a hot glue gun, glue petals to the back of your cardboard ring. Wait for the glue to dry before moving on to Step 4.
-

Step 04
Cut a 6cm strip of yellow felt and make small cuts along one side of the strip it to create a fringe. Cut the strip into segments and glue around the centre of your flower using your hot glue gun (covering up your cardboard ring).
-

Step 05
Turn the flower over and punch two holes, one at either side of your cardboard ring, using a hole punch. Attach elastic string to your flower hat (approximately 20cm long - but measure on your child’s head first for the exact length required.) Double knot your string to either side of the hat.
-

Step 06
Your flower hat is ready to twinkum with your Dinky Dinkum Blossom Buds!
 Welcome to Olli Ella!


